
Grewal's Automotive

That Loud Clunk Shifting From Park To Drive Means Worn Motor Mounts

That Loud Clunk Shifting From Park To Drive Means Worn Motor Mounts

You climb into your car, release the parking brake, shift from Park to Drive, and then – thud. A loud clunk rattles through the cabin. It might feel like something dropped under the hood, or like the whole drivetrain just lurched. That noise is not something to brush off. It is usually a symptom of worn motor mounts, and ignoring it can lead to bigger, more expensive problems down the road. What Are Motor Mounts and Why Do They Matter? Motor mounts are the connection points between your engine and the vehicle’s frame. Their job is to hold the engine in place while also absorbing the vibration and torque the engine produces during normal operation. Think of them like rubber cushions. Over time, that rubber breaks down, hardens, or cracks. When the cushion is gone, the engine shifts aggressively every time you change gears – and that movement is exactly what produces that clunk you are hearing. Why the Clunk Happens When Shifting From Park to Drive When you shift from Park to Drive, the transmission engages and torque is suddenly transferred through the drivetrain. A healthy motor mount absorbs that jolt quietly. A worn one lets the engine rock violently, pulling against hoses, cables, and surrounding components. The noise is essentially your engine banging against the limits of a mount that can no longer do its job. On rear-wheel drive vehicles like the Nissan Armada or certain Infiniti models, this clunk can feel especially pronounced because of how torque travels from the engine through the driveshaft. Other Symptoms That Point to Bad Motor Mounts A clunk when shifting is often the first sign, but it is rarely the only one. Here is what else to watch for: Vibration felt through the steering wheel or floor during acceleration A thud or clunk when shifting into Reverse as well Visible engine movement when someone revs the engine from under the hood A general rattling noise at idle or during gear changes Unusual stress on the CV joint or constant-velocity joint components These symptoms tend to get worse over time. What starts as an occasional noise can turn into a significant mechanical issue affecting your transmission, exhaust system, and even brake lines. Could It Be Something Else? Worn motor mounts are the most common culprit, but they are not the only possibility. If the clunk is accompanied by a delay in movement or the car hesitates before driving forward, the issue may involve the torque converter or internal transmission components. A loose gear stick, worn U-joints on rear-wheel drive vehicles, or failing constant-velocity joints can also produce similar noises. The important thing is not to self-diagnose. A proper inspection is the only way to know for sure. Vehicles That Commonly Experience This Problem While any vehicle can develop worn motor mounts, some models are more prone to early wear. Trucks and SUVs like the Nissan Armada tend to put more stress on mounts because of their heavier engines and the increased torque involved in towing and hauling. Older cars with high mileage, vehicles that do a lot of stop-and-go driving, and any car that has been in a minor accident are all at higher risk for mount failure. What Happens If You Keep Driving on Worn Motor Mounts Here is the straight answer: continuing to drive with worn motor mounts makes things worse, not just louder. The excessive engine movement can damage surrounding components, including the radiator system, exhaust system, and transmission lines. In extreme cases, a completely failed mount can allow the engine to shift so dramatically that it causes serious damage requiring full engine repair. The cost of replacing motor mounts is significantly lower than the cost of repairing what broken mounts can destroy. How Motor Mounts Are Replaced The repair process involves lifting the vehicle safely, supporting the engine with a jack or block, removing the old mounts, and installing new ones. It is not a job for a driveway mechanic without the right equipment. A qualified technician will also inspect surrounding components – like the suspension, CV joints, and transmission – during the repair to make sure nothing else was damaged by the excessive engine movement. Getting a Proper Diagnosis in Indianapolis If you are hearing a loud clunk when shifting from Park to Drive, the best next step is having a trained technician look at it. At Grewal’s Automotive in Indianapolis, the team can inspect your motor mounts, evaluate your transmission, and give you a clear, upfront estimate before any work begins. You can even use the 24-hour drop-off option if your schedule makes it hard to bring the car in during regular hours. Why That Loud Clunk Should Be Checked Now A loud clunk when shifting from Park to Drive is your vehicle telling you something is wrong – and worn motor mounts are the most likely cause. Catching it early protects your engine, transmission, and wallet. If that thud has been bothering you, do not wait for it to turn into something worse. Schedule a transmission inspection with Grewal’s Automotive today, or call 317-886-7501 to talk through what you are experiencing.

That Loud Clunk Shifting From Park To Drive Means Worn Motor Mounts Read More »

Understanding Automotive Diagnostic Trouble Codes and What They Mean

Understanding Automotive Diagnostic Trouble Codes and What They Mean

That little amber light on your dashboard can feel like a threat. Your check engine light comes on, your stomach drops, and suddenly you’re wondering if you’re looking at a $50 fix or a $5,000 problem. The truth is, that light is your vehicle trying to communicate with you, and understanding what it’s saying is the first step toward keeping your engine healthy. What Is an Automotive Diagnostic Trouble Code? A diagnostic trouble code, or DTC, is a standardized alphanumeric code generated by your vehicle’s on-board diagnostics system. When a sensor detects something abnormal, the car’s computer logs the issue and triggers the check engine light. Think of it as your vehicle filing a complaint report, except you need a translator to read it. Modern vehicles use OBD-II, a standardized system supported by SAE International, so a scan tool can pull the same DTC from virtually any vehicle built after 1996. How the System Actually Works Your vehicle is packed with sensors monitoring everything from fuel delivery to transmission performance to powertrain health. These sensors report back to a central computer, which processes the data in real time. When a reading falls outside an acceptable range, the system generates a DTC and stores it until the issue is resolved or the code is cleared. This is the same underlying technology that powers telematics systems used in fleet management. DIY OBD tools have also made vehicle monitoring more accessible for enthusiasts. But reading a code correctly and knowing what to do next still requires trained eyes. Common DTC Categories You Should Know DTCs follow a specific structure. The first character tells you which system is affected: P codes – Powertrain issues, including engine and transmission problems B codes – Body-related faults C codes – Chassis systems, like suspension and brakes U codes – Network and communication failures between modules Most drivers encounter P codes. A P0300, for example, signals a random engine misfire. A P0420 points to a catalyst system efficiency issue, which directly ties into emission standard compliance and vehicle emissions control. Ignoring these codes does not make them go away. It usually makes the underlying problem worse. Why You Should Not Ignore a DTC Some people clear a code and hope the light stays off. That is a bit like disabling a smoke detector instead of finding the fire. The code comes back because the condition that triggered it is still present. Unresolved DTCs can cascade. A minor fuel system issue can stress your engine. A transmission fault left unchecked can lead to complete powertrain failure. Professional diagnostic resources can help technicians pinpoint root causes rather than just symptoms, making the repair faster and more accurate. When to Act Immediately vs. When You Have Time Not every DTC signals an emergency, but some demand immediate attention. If your check engine light is flashing rather than steady, pull over safely and call for help. A flashing light typically indicates an active misfire that can destroy your catalytic converter within minutes. A steady check engine light with no other symptoms usually gives you a day or two to schedule a proper diagnostic. Either way, getting it checked promptly protects your investment and keeps your repair bill from growing. What a Professional Diagnostic Actually Involves A professional diagnostic goes far beyond plugging in a scan tool and reading a code. Skilled technicians cross-reference the DTC with live sensor data, vehicle history, and repair databases. They look at what the code is pointing to and what else might be contributing to the fault. This is where experience and software matter. Professional diagnostic tools, combined with databases that track real-world repair outcomes, help technicians make accurate calls the first time. The goal is not just to clear the light. It is to fix the actual problem. Getting Your DTC Diagnosed in Indianapolis If your check engine light is on and you are in Indianapolis, bringing your vehicle in for a proper diagnostic is the smart move. Grewal’s Automotive uses professional-grade diagnostic equipment to identify DTCs accurately, explain what they mean in plain language, and give you an honest estimate before any work begins. Their technicians are trained to handle both modern vehicles loaded with software-driven systems and older cars that require a more hands-on approach. You can even drop your vehicle off after hours using their 24-hour drop-off option if your schedule makes daytime appointments difficult. What to Do After an Automotive Diagnostic Trouble Code Appears A DTC is not a verdict. It is a starting point. Understanding what your vehicle is trying to tell you, and acting on it quickly, is what separates a minor repair from a major one. If your check engine light is on, do not guess. Schedule a professional engine diagnostic with Grewal’s Automotive in Indianapolis and get a clear answer backed by real expertise. Call 317-886-7501 to book your appointment today.

Understanding Automotive Diagnostic Trouble Codes and What They Mean Read More »

Why Manual Transmissions Are Hard to Shift Smoothly

Why Manual Transmissions Are Hard to Shift Smoothly

There is nothing more frustrating than a gear stick that grinds, sticks, or refuses to move cleanly. If you drive a manual transmission vehicle and every shift feels like a battle, something mechanical is trying to tell you something. The good news is that most causes of difficulty shifting gears are diagnosable and fixable before they lead to more serious damage. What Makes a Manual Transmission Work in the First Place A manual transmission is a mechanical device that relies on a carefully coordinated system to transfer engine power to the wheels. The clutch, gear, linkage, and fluid all have to work together seamlessly for smooth shifting. When any one of those components starts to fail, the whole driving experience suffers. Unlike an automatic transmission, which uses a transmission control unit and hydraulic systems to manage gear changes automatically, a manual setup puts the driver in control. That also means the driver is the first to notice when something feels off. Common Reasons Shifting Feels Difficult Clutch Problems Are the Most Likely Culprit The clutch is the heart of a manual transmission system. If the clutch is worn, misadjusted, or not fully disengaging, you will feel resistance every time you try to move the gear stick. A slipping or dragging clutch creates friction that makes clean gear changes nearly impossible. Clutch issues can also stem from the master cylinder or hydraulic components. The clutch on many modern vehicles operates through hydraulics, meaning hydraulic fluid pressure is what physically disengages the clutch plate. If there is a leak in the system or the master cylinder is failing, the pressure drops and shifting becomes a fight. Low or Contaminated Transmission Fluid Transmission fluid lubricates the internal gears and synchronizers inside the gearbox. When that fluid is low, old, or contaminated, the gear surfaces generate excess friction and heat. This leads to grinding, hesitation, or a gear stick that feels stiff and uncooperative. Checking and changing transmission fluid is a simple but often overlooked part of vehicle maintenance. If yours has never been serviced, that alone could explain your shifting problems. Worn or Damaged Synchronizers Synchronizers are small components inside the transmission that help match gear speeds before engagement. When they wear out, you get that classic grinding sound when trying to shift, especially into certain gears like second or third. Ignoring this leads to accelerating internal damage. Linkage Issues The mechanical linkage connecting your gear stick to the transmission can loosen, bend, or wear over time. When the linkage is out of alignment or damaged, your inputs at the gear stick do not translate accurately to the transmission. Shifts feel vague, sloppy, or incomplete. Brake and Clutch Fluid Overlap It is worth noting that some vehicles share brake fluid in their clutch hydraulic systems. A brake fluid leak or low brake fluid level can directly affect clutch performance. If your clutch pedal suddenly feels soft or spongy, check both the braking system and the clutch cylinder reservoir. Warning Signs You Should Not Ignore Pay attention to these signals from your vehicle: Grinding or crunching when shifting gears Gear stick that feels unusually stiff or loose Clutch pedal that sinks to the floor or has little resistance Difficulty getting into first gear or reverse Unusual noises when the engine is running in neutral Any of these symptoms point to a real mechanical issue that will not go away on its own. Does Vehicle Type Matter? Whether you drive a compact car, a light truck, or something like a diesel engine-powered work vehicle, manual transmission problems follow similar patterns. Even vehicles with older mechanical designs experience clutch wear and fluid degradation over time. The components may differ, but the root causes are often the same. Getting Your Transmission Diagnosed in Indianapolis If your manual transmission is giving you trouble, the team at Grewal’s Automotive can inspect the clutch system, fluid, linkage, cylinders, and internal gear components to find the exact cause. Continuing to force a struggling transmission through its gears will only lead to a more expensive repair down the road. When Manual Transmission Shifting Gets Difficult Difficulty shifting gears in a manual transmission is a warning you should take seriously. From clutch wear and hydraulic leaks to low fluid and damaged synchronizers, the causes are real and progressive. Catching the problem early keeps repair costs manageable and keeps you safe on the road. If your gear stick is fighting back, schedule a transmission inspection with Grewal’s Automotive at 317-886-7501 or visit our transmission service page to learn more about how we can help.

Why Manual Transmissions Are Hard to Shift Smoothly Read More »

Parking Brake Not Holding? Check the Cables First

Parking Brake Not Holding? Check the Cables First

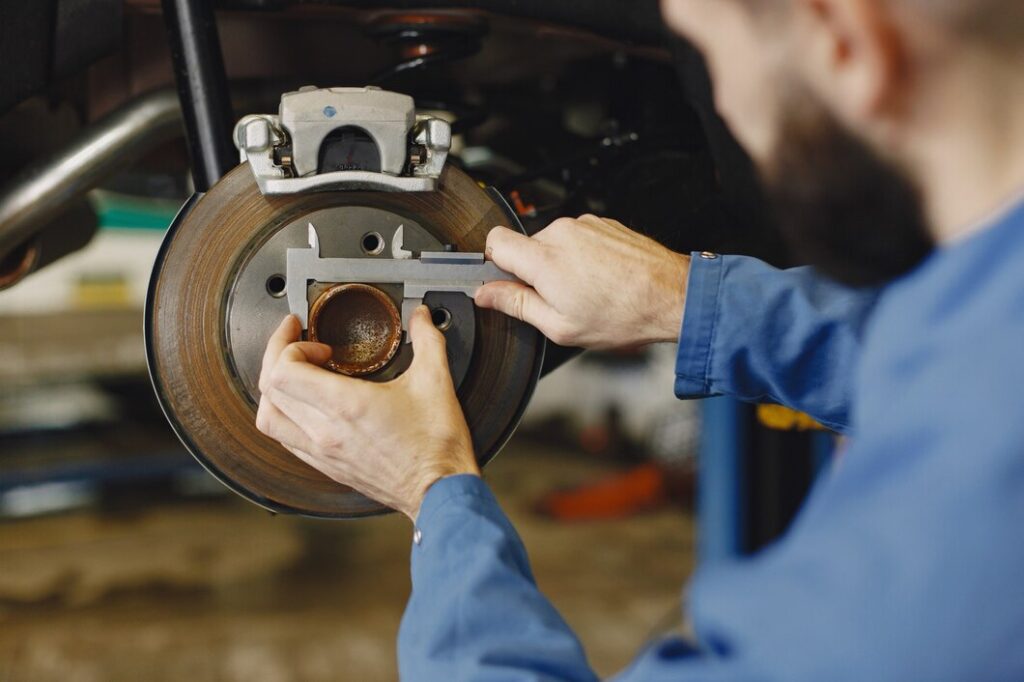
You pull up a steep driveway, set your parking brake, and step out. Then you hear it – or worse, you see it. Your car slowly rolls backward. That sinking feeling is your first clue that something has gone wrong with your parking brake system, and more often than not, the cables are the culprit. Before you panic or assume you need a full brake overhaul, let’s walk through what’s actually happening under your vehicle and why the cables deserve your attention first. How the Parking Brake Actually Works Most people think of the parking brake as a simple backup system, but it’s a mechanical network that operates independently of your regular hydraulic brake system. Unlike the hydraulics that power your everyday stopping power, the parking brake relies on physical cables to apply tension directly to the rear brakes. When you pull that lever or press the pedal, a steel cable runs from the actuator through a series of guides and connectors to reach each rear wheel. That cable physically squeezes either a drum brake shoe against the drum or a disc brake caliper against the rotor. It’s a straightforward system – until something interrupts that tension. Why Cables Are Usually the Problem Rust and Corrosion Are the Biggest Enemies Steel cables are strong, but they are not immune to the environment. Over time, moisture gets into the cable housing and triggers rust and corrosion. Once that sets in, the cable can seize inside its sleeve, preventing it from pulling tight or releasing fully. A seized cable won’t transmit force to the wheel, which means your parking brake isn’t holding even though you engaged it. Vehicles left sitting for long periods are especially vulnerable to this kind of wear. If you drive an older car or a rear-wheel drive truck that sees a lot of weather exposure, corroded cables become a real risk. Stretched or Snapped Cables Even without rust, cables stretch over time. Every time you engage the parking brake, you’re putting mechanical stress on those cables. Eventually, a stretched cable can no longer generate enough tension to hold the brake shoe or disc brake caliper firmly in place. In severe cases, a cable can snap entirely, leaving the system with zero holding power. This is different from what you’d see in a bicycle brake or railway brake, where cable replacements are more routine and visible. On a car, these cables are routed underneath the vehicle and through body panels, making the wear less obvious until it becomes a problem. The Adjustment Factor Sometimes the cable itself is fine, but it has simply gone out of adjustment. Brake components wear down over time, especially the drum brake shoes, which gradually get thinner with use. As the shoe wears, the cable needs to compensate, and without periodic adjustment, the system loses its holding ability even if the cable is in decent shape. A trained auto mechanic can spot this quickly during an inspection. It’s one of those repairs that costs very little if caught early but becomes a much bigger deal when ignored. What About Electronic Parking Brakes? More modern vehicles use an electronic parking brake instead of a traditional lever and cable setup. This system uses a motor-driven actuator to apply the rear brakes, so there’s no physical cable to stretch or corrode in the same way. However, the wheel cylinder, caliper, and brake components still wear out. If your electronic parking brake isn’t holding, the issue often points to the motor, a sensor failure, or worn rear brake components rather than a cable. If you’re unsure which system your vehicle uses, your technician can tell you within minutes of looking at it. Signs Your Parking Brake Cables Need Attention You don’t need to wait for your car to roll away to take action. Watch for these warning signs: The parking brake lever pulls all the way up with very little resistance You hear a grinding or scraping noise when you apply or release the parking brake The brake warning light stays on even after you release it Your vehicle moves slightly even when the parking brake is fully engaged One rear tire drags while driving, which can indicate a seized cable that won’t release Any of these is a signal to get an inspection scheduled before the risk of a real emergency arrives. Don’t Overlook the Rest of the Brake System A parking brake problem rarely exists in a vacuum. When a technician digs into the cables, they’ll also evaluate the condition of the drum brake or disc brake components, the wheel cylinder if applicable, and the overall rear brake setup. Worn shoes, seized calipers, or thin rotors can all make the parking brake perform poorly even after a cable replacement. That’s why a thorough brake inspection covers the full system, not just the obvious point of failure. What to Do When Your Parking Brake Isn’t Holding If your parking brake isn’t holding, don’t guess your way through a fix. Cables stretch, corrode, and snap in ways that aren’t always visible without getting underneath the vehicle. At Grewal’s Automotive in Indianapolis, the team handles full brake inspections with honesty and no surprise charges. They’ll tell you exactly what’s going on and what it will take to make it right. To get started, schedule your brake service or call 317-886-7501 to talk through what you’re experiencing.

Parking Brake Not Holding? Check the Cables First Read More »

Disc Brakes Vs Drum Brakes: Why Stopping Power Isn't Equal

Disc Brakes Vs Drum Brakes: Why Stopping Power Isn’t Equal

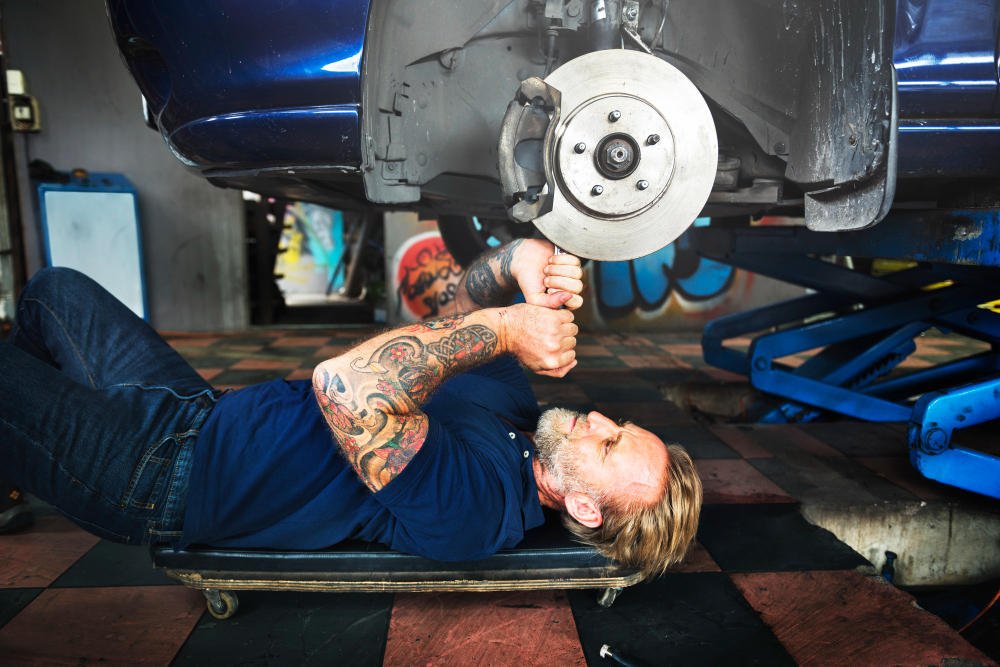
Not all brakes are built the same. If you’ve ever wondered why some vehicles stop more confidently than others, the answer often comes down to what’s happening inside each wheel. Understanding the difference between disc brakes and drum brakes can help you make smarter decisions about your vehicle’s safety and maintenance. How Each Brake System Actually Works The Mechanics Behind Disc Brakes A disc brake uses a flat, circular rotor attached to the wheel. When you press the brake pedal, brake fluid travels from the master cylinder through the hydraulic lines, pushing a piston inside a caliper. That piston squeezes a brake pad against the rotor, and friction does the work of slowing the car down. The open design of a disc brake allows heat to escape quickly. This matters more than most drivers realize, because heat is one of the biggest enemies of stopping power. The Mechanics Behind Drum Brakes A drum brake works differently. Instead of clamping down on a rotor, curved brake linings press outward against the inside of a spinning drum attached to the wheel. A wheel cylinder, activated by brake fluid pressure from the master cylinder, forces the linings outward using hydraulics. Drum brakes are a simpler and older technology. They’ve been used in the automotive industry for decades, long before disc brakes became standard on passenger cars. You’ll still find them today, most commonly on rear wheels and on heavier vehicles. Why Disc Brakes Offer Better Stopping Power Heat management is where the real difference shows up. During hard driving or repeated braking, drum brakes trap heat inside the drum. This leads to brake fade, a dangerous condition where your brakes become less effective the hotter they get. Disc brakes, by contrast, shed heat quickly, making brake fade far less likely. Disc brakes also perform better in wet conditions. Water can get trapped inside a drum, reducing the friction between the brake lining and the drum surface. Disc brakes are exposed and self-cleaning, meaning water gets flung off the rotor almost immediately. The force applied through a disc brake system is also more consistent. The geometry of a caliper and pad pressing against a flat rotor gives drivers a more predictable, linear stopping response compared to the lever-like mechanics of a drum system. Where Drum Brakes Still Make Sense Drum brakes are not without their advantages. Their enclosed design makes them well-suited as a parking brake, which is why many vehicles with disc brakes on the front still use a drum-style mechanism at the rear for the emergency brake. They are also less expensive to manufacture. The lower cost and simpler design have kept them in use on budget vehicles, rear-wheel drive trucks, and some light commercial applications. You’ll even see drum-style braking principles referenced in industries far outside the car – from railway brake systems on freight trains to certain bicycle brake designs. For everyday city driving in Indianapolis, where stop-and-go traffic is common, disc brakes on the front wheels do most of the heavy lifting. The rear brakes, whether disc or drum, handle far less of the braking force under normal conditions. Disc vs. Drum: A Quick Comparison Feature Disc Brakes Drum Brakes   Heat dissipation Excellent Poor Wet weather performance Strong Weaker Brake fade resistance High Lower Cost Higher Lower Parking brake use Less common Common Typical placement Front (and rear on modern cars) Rear on older/budget vehicles What This Means for Your Brake Maintenance Whichever system your vehicle uses, the core principle is the same – worn components reduce stopping power and increase risk. Brake pads wear down over time. Brake fluid absorbs moisture and loses effectiveness. Rotors can warp. Drums can crack or glaze. Catching these issues early keeps you safe and saves you money on bigger repairs later. Why Disc Brakes Usually Stop Better Disc brakes deliver superior stopping power, better heat management, and more consistent performance across most driving conditions. Drum brakes still serve a purpose, especially as a cost-effective option on rear wheels and as part of the parking brake system. Either way, both systems need regular attention to work as designed. If your brakes feel soft, noisy, or slow to respond, it’s time to get them checked. Schedule a brake maintenance inspection with the team at Grewal’s Automotive or call 317-886-7501 today.

Disc Brakes Vs Drum Brakes: Why Stopping Power Isn’t Equal Read More »

10 Things to Do While You Wait for Your Car Repair in Indianapolis, IN

Grewal’s Automotive sits at 5210 Commerce Cir, Suite C, just off the intersection of Southport Road and Emerson Avenue on the south side of Indianapolis. That intersection happens to be one of the busiest little pockets of restaurants, shops, and errands in the area, so whether you are in for something quick like preventative maintenance or computer diagnostics, or a longer repair like engine repair or transmission repair, you have plenty of options nearby to make good use of the time. Below are ten ways to spend your wait, listed roughly by distance, from a short walk to a quick drive. 1. Fill a Prescription at CVS CVS on S Emerson Ave is about as close as it gets, just down the block from our shop. It is a convenient stop for a prescription refill, a few household essentials, or anything else on your list while you wait on something quick. 2. Grab a Quick Bite at Subway If you just need something fast, Subway is right next to CVS on S Emerson Ave. It is an easy option if your vehicle only needs a short visit, such as a fluid check or a quick inspection, since you can be in and out in a matter of minutes. 3. Get Your Coffee Fix at Dunkin’ Dunkin’ on S Emerson Ave is a solid choice if you want a coffee and something to snack on before heading back to the shop. It is close enough that you will not lose much time getting there and back, making it a good fit for a shorter wait. 4. Sit Down for a Meal at Barton’s Pub For a longer repair, like suspension and brake work, Barton’s Pub on S Emerson Ave is a comfortable spot to settle in. It has a neighborhood bar and grill feel, so you can relax over lunch or dinner, catch a game on TV, and let our technicians take care of the rest. 5. Treat Yourself at Ritter’s Frozen Custard Ritter’s Frozen Custard on E Stop 11 Rd is a great stop if you want something sweet. Whether you are waiting on a quick oil change or something longer, a cup of frozen custard or a milkshake is an easy way to make the wait more enjoyable, especially if you have kids with you. 6. Have Lunch or Dinner at Chicago’s Pizza Also on E Stop 11 Rd, Chicago’s Pizza is a good pick if your vehicle needs more time, such as driveline repair or a heating and cooling issue. It is a comfortable, family-friendly spot to sit down for a full meal instead of watching the clock in our lobby. 7. Pick Up Groceries at Meijer Meijer on E Southport Rd is a convenient stop if you need to knock out your grocery list while your car is being serviced. It is close enough to make a quick trip without cutting it too close on time, especially for a routine maintenance visit. 8. Run Errands at Target Just down the road from Meijer, Target on E Southport Rd is another easy option for errands, whether you need household items, a few groceries, or something specific. It pairs well with a repair that takes an hour or two to complete. 9. Grab a Meal at Cheddar’s Scratch Kitchen If you would rather drive a few extra minutes for a sit-down meal, Cheddar’s Scratch Kitchen on Noggle Way is worth the trip. It is a good option for longer repairs, such as engine repair, when you would rather relax over a full meal than run errands close to the shop. 10. Catch a Game at St. Francis Soccer Club If you or your kids have a game or practice already scheduled at St. Francis Soccer Club on S Arlington Ave, a longer service appointment is a good time to fit it in. It is a bit further from our shop than the other spots on this list, so it works best when you already have something planned there rather than as a spur-of-the-moment stop. Auto Repair You Can Trust Grewal’s Automotive has proudly served Indianapolis drivers since 2007. As a family-owned shop and an AAA Approved Auto Repair Facility, we back our work with ASE-certified technicians, honest recommendations, and a one-year warranty on most parts and labor. It is part of why drivers across the South Side have left us over 200 five-star reviews on Google, whether they came in for routine service or a more involved repair. Have a question about what your vehicle needs, or want to see the full range of services we offer? Visit our services page, browse our blogs for maintenance tips, or contact us directly. You can also call us at 317-886-7501, and we will give you a good idea of how long your visit should take so you can plan your time accordingly.

10 Things to Do While You Wait for Your Car Repair in Indianapolis, IN Read More »

Transmission Fluid Flush vs Change: Which One Your Car Needs

Transmission Fluid Flush vs Change: Which One Your Car Needs

If you have ever stood at the service counter wondering whether you need a transmission fluid flush or just a change, you are not alone. These two services sound similar, but they work differently and serve different purposes. Getting the wrong one at the wrong time could cost you more in the long run. What Is a Transmission Fluid Change? A transmission fluid change is the simpler of the two services. A technician drains the old automatic transmission fluid (ATF) from the pan, removes and cleans the pan, and may replace the filter and gasket before adding fresh fluid. The catch is that this process only removes about 40 to 50 percent of the old fluid. The rest stays inside the torque converter and other internal passages of the transmission. It is still a worthwhile service, especially as part of routine maintenance. What Is a Transmission Fluid Flush? A transmission flush is a more thorough process. A machine connects to the transmission cooler lines and uses hydraulic pressure to push out nearly all of the old fluid, including what lives inside the torque converter and the pump. Fresh ATF replaces the old lubricant completely. This leaves less room for contamination buildup to cause wear or shifting problems down the road. How Often Should You Change or Flush Transmission Fluid? Timing matters as much as the type of service. Most manufacturers recommend a fluid change every 30,000 to 60,000 miles for conventional ATF, while full synthetic fluid can often stretch to 60,000 to 100,000 miles between services. Vehicles used for towing, frequent stop-and-go driving, or hot climates typically fall under a “severe duty” schedule and need service on the shorter end of that range. Check your owner’s manual for the exact interval, since it varies by make, model, and transmission type. If you are not sure when your transmission was last serviced, especially on a used vehicle, that is usually a sign it is time for an inspection rather than a guess. How Do You Know Which One Your Vehicle Needs? This is where most car owners get stuck. Here is a straightforward way to think about it. A fluid change works well if: Your vehicle is relatively new and on a regular maintenance schedule The ATF is still light in color and not burned-smelling You are following manufacturer service intervals A flush makes more sense if: The fluid looks dark, dirty, or smells burnt You recently bought a used vehicle and do not know its service history Your automatic transmission has been showing hesitation or rough shifting If the fluid is severely contaminated and the transmission is already struggling, a flush can sometimes carry more risk by stirring up debris. That is why a professional inspection matters before you decide. How Much Does a Transmission Fluid Change or Flush Cost? Cost is often the deciding factor between the two services. A standard drain-and-fill typically runs $80 to $250, depending on your vehicle and how much fluid it holds. A full machine flush usually costs more, generally $125 to $400, since it uses more fluid (often 12 to 22 quarts instead of the 5 to 7 quarts a drain-and-fill uses) and specialized equipment to cycle it through the whole system. That price difference reflects the extra fluid and labor involved, not just an upsell. A drain-and-fill is also quicker, usually under an hour, while a flush takes a bit longer since more fluid has to cycle through. If you want an accurate number for your specific vehicle, the team at Grewal’s Automotive can inspect your fluid condition and give you a straightforward quote before any work begins. Does Brand Matter? A Word on Where You Go You might have seen quick-lube chains like Jiffy Lube offer these services, but transmission work is more involved than an oil change. Unlike brake fluid or coolant swaps, ATF services require knowledge of your specific vehicle’s torque specifications and fluid type. Working with a shop that knows transmissions – not just fluids – protects your investment. Frequently Asked Questions Can a transmission flush damage an older or high-mileage transmission? In some cases, yes. If a transmission has never been serviced and the fluid is heavily contaminated, a flush can dislodge built-up debris and cause slipping or clogging. A drain-and-fill is often the safer choice for neglected, high-mileage transmissions. We can inspect your fluid and recommend the option that fits your situation. What color should healthy transmission fluid be? Healthy ATF is typically red or pink with a slightly sweet smell. Fluid that has turned brown, dark red, or has a burnt smell is a sign it needs attention. Can I flush my own transmission fluid at home? A basic drain-and-fill is possible for some DIYers with the right tools, but a full flush requires specialized equipment that connects to the transmission cooler lines. Most drivers get a more thorough and accurate service by having it done professionally. Is a transmission flush the same as a full fluid change? Not exactly. A standard fluid change only replaces the fluid in the pan, roughly 40 to 50 percent of the total. A flush uses pressure to replace nearly all of the fluid, including what sits in the torque converter and cooler lines. How do I know if my transmission fluid needs to be serviced now? Watch for dark or burnt-smelling fluid, rough or delayed shifting, slipping, or unusual noises. If you notice any of these, or you are not sure when your fluid was last changed, it is worth scheduling an inspection. Keep Your Transmission Healthy in Indianapolis Your transmission is one of the hardest-working mechanical components in your vehicle. Whether you drive a newer car or an older truck, staying on top of fluid quality is one of the easiest ways to avoid expensive repairs. Not sure which service your vehicle needs? The team at Grewal’s Automotive in Indianapolis can inspect your transmission fluid and walk you through the right option for your car –

Transmission Fluid Flush vs Change: Which One Your Car Needs Read More »

How Long Does A Clutch Actually Last

How Long Does A Clutch Actually Last

If you drive a manual transmission vehicle, you’ve probably wondered at some point how long your clutch is going to hold up. It’s a fair question, and the honest answer is: it depends. But there are some solid benchmarks and warning signs worth knowing before you end up stranded. The General Lifespan of a Clutch Most clutches are built to last somewhere between 50,000 and 100,000 miles. Some drivers push well past that, while others burn through one in under 60,000 miles. Longevity really comes down to how the vehicle is driven and how much wear and tear the clutch system absorbs over time. A well-maintained clutch on something like a Mazda MX-5 or Mazda MX-5 (NC) can easily exceed 100,000 miles with smooth, controlled driving habits. On the other hand, aggressive clutch control – like riding the pedal or slipping the clutch constantly in stop-and-go traffic – shortens its life significantly. Does Every Car Have a Clutch? Not exactly, and the answer depends on the type of transmission. A traditional manual transmission uses a mechanical clutch disc and pressure plate, the type this article has been describing so far. Every time you press the clutch pedal, that disc disengages from the flywheel so you can shift gears. Traditional automatic transmissions work differently. Instead of a friction clutch, they use a torque converter to transfer power, so there is no clutch disc wearing down the way a manual’s does. That said, automatics are not entirely clutch-free. Many modern automatics, including CVTs and dual-clutch transmissions (DCTs), rely on internal clutch packs to manage gear changes, and those can wear down over time too, especially if fluid changes are skipped or the vehicle is driven hard. If you are not sure what type of transmission your vehicle has, our technicians can take a look during a transmission inspection and let you know what to expect for wear and maintenance. What Affects Clutch Wear the Most Driving Habits This is the biggest factor. Every time you engage or disengage the clutch, friction occurs between the clutch disc and the flywheel. That friction is what transfers power from the engine to the gear and transmission. The more abuse it takes, the faster it wears down. Drivers who frequently tow heavy loads, drive in heavy traffic, or make quick, aggressive gear changes put extra pressure on clutch components. Smooth, deliberate driving is what keeps a clutch lasting longer. Vehicle Type and Use Smaller cars tend to be easier on clutches than trucks or performance vehicles. A daily commuter car used mostly on highways will naturally experience less clutch wear than one used for frequent city driving or towing. Warning Signs Your Clutch May Be Failing Clutch failure rarely happens without warning. Here are the signs to watch for: Slipping clutch – The engine revs rise, but the car does not accelerate properly Difficulty shifting gears – Grinding or resistance when moving between gears Spongy or soft pedal feel – The clutch pedal feels different than usual under foot pressure Burning smell – A sharp, acrid odor after driving, especially on hills Unusual noise – Squealing or rattling when the clutch pedal is pressed or released If you notice any of these, it is time to have a technician take a look before the problem worsens. How Much Does Clutch Replacement Cost? Once you know the warning signs, the next question is usually about price. Nationally, clutch replacement typically runs between $800 and $2,500, with many drivers landing in the $1,200 to $1,800 range for a full clutch kit and labor. Labor is the biggest piece of that cost. Because the transmission has to come out to access the clutch, the job usually takes four to eight hours of shop time, sometimes more on trucks, all-wheel-drive vehicles, or tightly packed engine bays. Parts alone (the clutch disc, pressure plate, and release bearing) are relatively affordable, generally $300 to $800 for a quality kit. If the flywheel needs resurfacing or replacing, that adds to the total as well. The exact number depends on your vehicle, the parts used, and local labor rates. The best way to know what to expect is a hands-on inspection with our clutch and transmission service team, so you get a real number instead of a guess. How to Extend Your Clutch’s Life Good news: extending clutch life is largely within your control, and it does not require anything drastic. Avoid resting your foot on the clutch pedal while driving. Even light pressure causes unnecessary wear on the release bearing. Do not use the clutch to hold the car on a hill. Use the parking brake or footbrake instead. Shift smoothly and match your revs when downshifting rather than riding the clutch. Avoid unnecessary idling in gear with the clutch partially engaged, especially in stop-and-go traffic. If your vehicle is approaching 60,000 miles and has never had the clutch inspected, or if you are noticing any of the warning signs above, a professional diagnosis makes sense. Catching a clutch problem early can prevent more expensive transmission damage down the road. How to Make Your Clutch Last Longer If your vehicle is approaching 60,000 miles and you have never had the clutch inspected, or if you are noticing any signs of wear or failure, a professional diagnosis makes sense. Catching a clutch problem early can prevent more expensive transmission damage down the road. Frequently Asked Questions About Clutch Lifespan Can you still drive with a slipping clutch? It is not a good idea to keep driving for long once you notice slipping. A slipping clutch continues to wear down and can leave you stranded or lead to more expensive damage to the flywheel and transmission. We recommend having it inspected as soon as possible. How long does a clutch replacement take? Most clutch replacements take four to eight hours of shop time, depending on the vehicle and whether other components like the flywheel or release bearing need attention. We will give you a

How Long Does A Clutch Actually Last Read More »

Torque Converter Problems: Symptoms Every Driver Should Know

Torque Converter Problems: Symptoms Every Driver Should Know

Most drivers assume a shuddering transmission means it is time to replace the whole unit. That assumption costs people thousands of dollars they did not need to spend. The real culprit is often the torque converter, a component that is easy to overlook but impossible to ignore once it starts failing. Understanding what the torque converter actually does – and what it looks like when it stops doing its job – puts you in a much better position to make smart repair decisions. What a Torque Converter Actually Does The torque converter sits between the engine and the automatic transmission. Its job is to transfer engine power to the transmission using hydraulic fluid, allowing your vehicle to stop without stalling and to accelerate smoothly from a standstill. Inside the converter, you have an impeller, a turbine, and a stator. The impeller spins fluid toward the turbine, which drives the transmission. The stator redirects that fluid to multiply torque at low speeds. When any of these components wear out or fail, the effects show up throughout the drivetrain. Unlike a manual transmission, which uses a physical clutch to engage and disengage power, an automatic transmission relies entirely on the torque converter and its fluid dynamics to manage power delivery. Common Torque Converter Problems Symptoms You Should Not Ignore Shuddering During Acceleration This is the most frequently misdiagnosed sign. When the torque converter clutch lockup mechanism wears out or gets stuck, you will feel a shudder or vibration – usually between 40 and 50 mph – that feels like driving over rumble strips. It happens during light acceleration and disappears at higher speeds or when you brake. This shudder is not a transmission gear problem. It is a torque converter lockup failure. Slipping Between Gears If your vehicle hesitates, surges, or loses power between gear changes, the converter may not be maintaining proper fluid pressure. Low fluid pressure inside the converter can cause the turbine to spin inconsistently, creating that unsettling slip feeling during acceleration. Overheating Transmission Heat is a transmission killer. A failing torque converter can cause hydraulic fluid to break down faster, raising transmission temperatures. When fluid overheats, it loses its ability to protect internal components, which leads to accelerated wear on bearings and seals. Contaminated Transmission Fluid Dark, burnt-smelling fluid is a serious warning sign. Torque converter problems often include debris and metal particles circulating through the fluid, which indicates internal damage to the impeller or turbine. Contamination like this spreads throughout the system if left unchecked. Strange Noises at Low RPM A rattling or whining noise at low revolutions per minute – especially when the vehicle is barely moving – often points to a worn bearing inside the converter. These unusual noises tend to disappear once the vehicle reaches higher speeds. Why Getting the Diagnosis Right Matters A proper inspection is the only way to confirm whether you have a torque converter issue or something else entirely. Shops that skip thorough diagnostics sometimes recommend a full transmission replacement when a converter service or replacement alone would solve the problem at a fraction of the cost. Transmission fluid analysis, pressure testing, and road testing under specific conditions are all part of a reliable diagnosis. If an auto mechanic is recommending a major repair without performing these steps, ask questions before agreeing to anything. Leaks around the converter housing, clutch failures, and bearing wear all have distinct diagnostic signatures. Matching symptoms to the right root cause is what separates a good repair from an expensive mistake. How to Prevent Torque Converter Failure Routine maintenance is the best defense. Keeping fresh, clean hydraulic fluid in your automatic transmission reduces heat buildup and prevents the kind of contamination that destroys converter components over time. Change transmission fluid at the intervals recommended for your specific car or truck Watch for early warning signs like shuddering, slipping, or unusual noises Do not ignore fluid leaks – small leaks become big failures quickly Have your transmission inspected if you notice any change in how your vehicle accelerates or shifts Know the Signs of Torque Converter Trouble Torque converter problem symptoms are specific, diagnosable, and in many cases fixable without replacing your entire transmission. The key is catching them early and working with technicians who take the diagnosis seriously. If your vehicle is shuddering, slipping, or overheating, do not guess – get a professional inspection. Schedule your transmission service with the team at Grewal’s Automotive, or call us at 317-886-7501 to talk through what you are experiencing before it gets worse.

Torque Converter Problems: Symptoms Every Driver Should Know Read More »

Brake Pedal Goes to the Floor? Air in the Lines Is the Culprit

Brake Pedal Goes to the Floor? Air in the Lines Is the Culprit

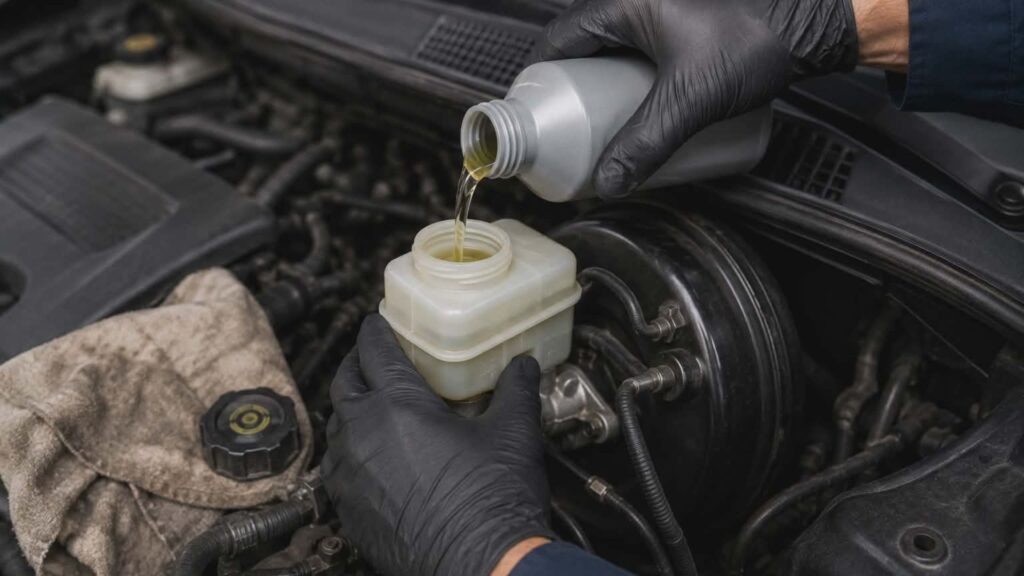
You press the brake pedal, and it sinks straight to the floor. Your heart probably sinks with it. That spongy, unresponsive feeling is one of the most unsettling things a driver can experience – and for good reason. Your brakes are the most critical safety system on your car, and when they stop responding normally, something has gone seriously wrong. More often than not, the problem comes down to one sneaky villain: air in the brake lines. How Your Brake System Actually Works Your car’s braking system is a hydraulic brake system. That means it relies entirely on fluid pressure to function. When you press the pedal, the master cylinder pushes brake fluid through a series of lines to each wheel. That pressure activates the brake pads or drum brake shoes, which clamp down and slow the vehicle. The key word here is pressure. Hydraulic fluid does not compress. That is what makes it so effective for brakes. When you push, the pressure transfers instantly and completely to every wheel. Air, on the other hand, compresses easily. So when air sneaks into the brake lines, the pressure you generate with your foot gets absorbed by that air pocket instead of reaching the brakes. The pedal travels too far, feels soft, or goes straight to the floor. Why Air Gets Into the Brake Lines Air does not just wander in on its own. It usually gets in through a few common causes. Low brake fluid is the most frequent entry point. The reservoir that feeds your master cylinder has a minimum level. When fluid drops below that level – often because of a leak somewhere in the system – air fills the gap. A worn brake hose, a cracked cylinder, a bad grommet, or even a deteriorating wheel cylinder can all cause fluid to escape quietly before you even notice. Old or degraded brake fluid is another issue. Brake fluid absorbs moisture over time. That moisture lowers the fluid’s boiling point and can cause the fluid to vaporize under heat, especially during heavy braking. Vapor, like air, compresses – and the result feels identical to having air in the lines. Improper brake service is the third common cause. If a technician replaces a disc brake caliper or drum brake component and does not bleed the lines correctly afterward, air can get trapped in the system. It happens at quick-lube shops too – places like Jiffy Lube focus on fast oil changes, but brake work is a different level of precision. It requires proper bleeding, the right tools, and attention to detail. What the Master Cylinder and Power Brakes Have to Do With It The master cylinder sits at the heart of the entire system. It converts the force of your foot, amplified by the vacuum servo (also called the brake booster), into hydraulic pressure. The brake booster uses engine vacuum to multiply your pedal force, which is why power brakes feel so effortless compared to a vehicle without power assist. If the master cylinder develops an internal leak or the piston inside wears out, it cannot build proper pressure even with perfect fluid. That feels similar to air in the lines. Diagnosing the difference requires a trained eye and the right equipment. Symptoms That Air Is the Problem Here is what to watch for beyond the pedal going to the floor: A spongy or soft pedal that firms up slightly after pumping The pedal slowly sinking under steady pressure Inconsistent braking performance, especially after stopping on a long downhill Visible brake fluid near a wheel or under the hood near the reservoir The anti-lock braking system (ABS) can also trigger warning lights when fluid pressure is inconsistent. If your ABS light comes on alongside a soft pedal, do not ignore it. Can You Drive With a Brake Pedal That Goes to the Floor? No. This is not a “wait and see” situation. A vehicle with a failing hydraulic brake system can lose stopping ability entirely. If you are in Indianapolis and you notice this symptom, pull over safely and call for help. Do not try to limp it to the shop. Getting It Fixed Properly The repair process typically involves inspecting the entire brake system for leaks, checking the master cylinder and wheel cylinders, replacing any damaged components, refilling the reservoir with fresh fluid, and bleeding the system to remove all air. Bleeding brakes is not complicated, but it has to be done right. Each wheel must be bled in the correct sequence, with enough fluid pushed through to clear every air pocket. Sediment in old fluid can clog lines and interfere with piston movement if it is not flushed out properly. Your Brakes Deserve a Real Inspection A spongy brake pedal is never just a minor annoyance. It is a warning that your hydraulic brake system is compromised – and it only gets worse if ignored. Schedule a brake inspection with the team at Grewal’s Automotive to get a clear diagnosis and honest repair estimate before it becomes a bigger problem. Call 317-886-7501 to set up your appointment.

Brake Pedal Goes to the Floor? Air in the Lines Is the Culprit Read More »